I have always been using Wordpress to host and publish my blog post, with no custom domain the whole idea of paying $8 per month was just foreign to me. The idea of monetization and being able to install plug-ins has always been in the back of my head especially with my blog stats at over 16000 hits, that would make me rich - # hahaha
While I’ve been thinking of doing the move for quite some time, until I recently found out about Jekyll and GitHub pages, that is when I finally decided to move. The idea of writing my posts in MarkDown was a win, as compared to HTML on Wordpress.
What is this Jekyll I speak off?
![]()
TLDR; Jekyll is a simple, blog-aware, static site generator for personal, project, or organization sites. Written in Ruby by Tom Preston-Werner, GitHub’s co-founder, it is distributed under an open source license.
For a more detailed explanation
Jekyll is a simple, blog-aware, static site generator. You create your content as text files (Markdown), and organize them into folders. Then, you build the shell of your site using Liquid-enhanced HTML templates. Jekyll automatically stitches the content and templates together, generating a website made entirely of static assets, suitable for uploading to any server. Jekyll happens to be the engine behind GitHub Pages, so you can host your project’s Jekyll page/blog/website on GitHub’s servers for free.
Process Outline
The process is:
- Install Jekyll and dependencies
- Setup a GitHub Page/Repo/Site
- Setup/Clone a theme
- Test Jekyll hosting
- Import Posts
- Import Comments
- Setup a few other things (analytics, rss feed)
- Go Live
- [optional] Custom domain
Assumptions
In this post I will detail the process I followed to move the content from Wordpress to Jekyll. With minor assumptions.
Assumptions:
- You have a registered domain name.[optional]
- You have a GitHub account.
- You are running a Linux (Ubuntu 16.04) environment and Git installed.
- You have a Wordpress blog.
- [optional] You have enabled Google Adsense and Google Analytics and have tokens/id’s handy.
Installations
Before we install Jekyll we need to ensure all dependencies are installed.
$ sudo apt update
$ sudo apt-get install git gcc ruby ruby-dev libxml2 libxml2-dev libxslt1-dev zlibc zlib1g-dev
It is best to avoid installing Ruby Gems as the root user. Therefore, we need to set up a gem installation directory for your user account. The following commands will add environment variables to your ~/.bashrc file to configure the gem installation path. Run them now:
echo '# Install Ruby Gems to ~/gems' >> ~/.bashrc
echo 'export GEM_HOME=$HOME/gems' >> ~/.bashrc
echo 'export PATH=$HOME/gems/bin:$PATH' >> ~/.bashrc
source ~/.bashrc
After that we can install the Jekyll generator by using the Ruby package manager Rubygems. Also we will install the Ruby bundler tool for future needs.
gem install jekyll bundler
That’s it! You’re ready to start using Jekyll.
Setup GitHub Pages
As per definition - It is static HTML so you can host it pretty much anywhere. Fortunately GitHub offers free hosting for project and personal web sites under GitHub Pages and GitHub also has intrinsic knowledge of Jekyll. What this basically means is:
- You generate your content
- Commit and push your changes
- GitHub will automagically run Jekyll for you and generates the site
Thus making the whole publishing process much more streamlined. And, you don’t need to upload your entire site every time.
[How-to] GitHub pages
Get yourself a GitHub Personal Page set up, which gives you
Note: Instructions are on the page.
Setup/Clone a Theme
After trying out a couple of themes, I finally found one - that I liked. An awesome theme by Dean Attali which is open -source with MIT licence. More themes can be located on Jekyll-Themes
Cloning done right.
Head over to https://github.com/daattali/beautiful-jekyll [Fork, Clone and Customize the repo.]
    # Clone github pages repository.
    $ git clone git@github.com:daattali/beautiful-jekyll.git
    # Rename your git directory
    $ mv beautiful-jekyll <username>.github.io && cd $_
    # Remove remote address and replace it with your one.
    $ git remote remove origin
    # Replace it with your own one [Remember you created a GP]
    $ git remote add origin git@github.com:<username>/<username>.github.io.git
    # Update the tracking information of the new branch
    $ git branch --set-upstream-to=origin/master master
    # Sanity check
    $ git pull origin master
    # Open _config.yml and edit (follow the comments or read daattali's github repo page)
    $ vim _config.yml
Setting up your own somewhat default theme
    # Clone github pages repository.
    $ git clone git@github.com:<username>/<username>.github.io.git
    $ cd <username>.github.io
    $ vim _config.yml
Create the new blog with Jekyll [Optional]
Creating a new blog with Jekyll is as easy as run the following command
$ jekyll new new_site
This will generate an example site using the default theme called Minima. You can check it by running the command.
$ cd new_site
$ jekyll serve -w
This will build the site and start a server in the localhost at the port 4000. Then you can open that http://localhost:4000 in your browser and see how it looks.
Import your posts from Wordpress to Jekyll
Once you have the skeleton running, next step is to import posts.
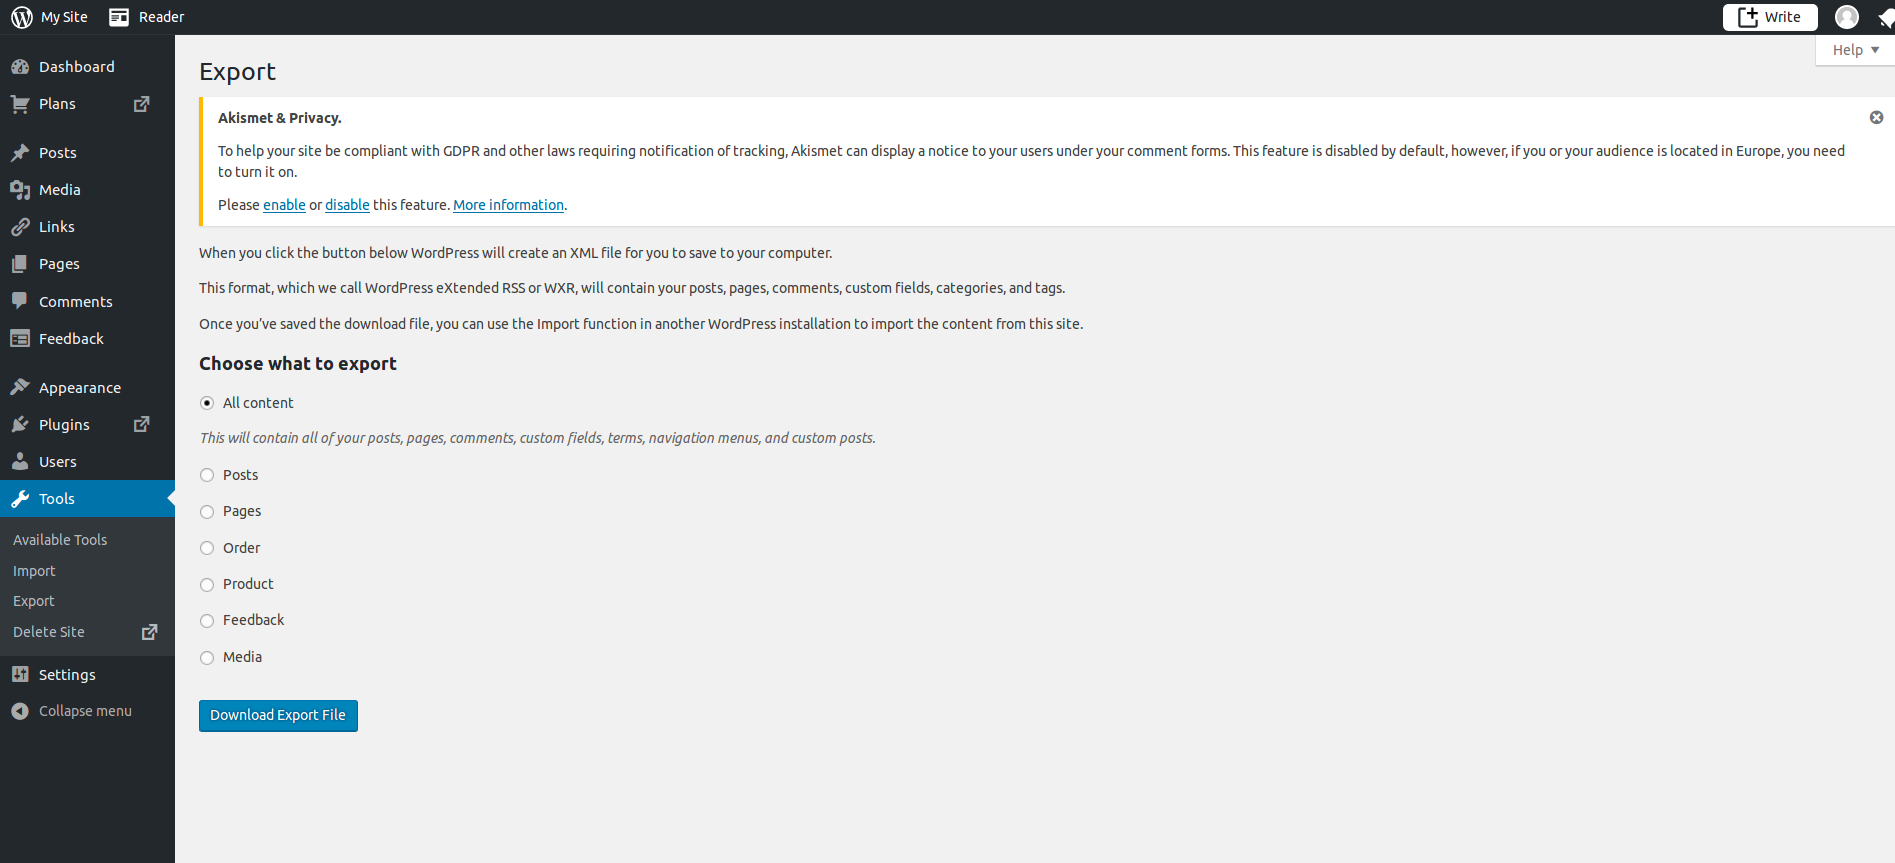
- Go to your Dashboard on your WordPress blog and export your posts. Pick to export everything then export using the included export tool from the Wordpress administration downloading a file called wordpress.xml
Once the XML file is done, copy it to your new <username>.github.io directory.
After that I installed some gems to get a script able to do the importation
    $ cd <username>.github.io
    $ gem install jekyll-import hpricot open_uri_redirections
The important piece is jekyll-import in charge to import all the data included and download all the media referred in the xml export file generated. This is the script that run the work.
    $ ruby -rubygems -e 'require "jekyll-import";
        JekyllImport::Importers::WordpressDotCom.run({
          "source" => "wordpress.xml",
          "no_fetch_images" => false,
          "assets_folder" => "assets"
        })'
for more options go to Jekyll Imported.
Finally, this imported all the posts (published and drafts) and downloaded all images included in the posts from the blog.
If all went well, you should now have all your posts in the _posts directory with all your old posts in it.
Tweak any other issues you may find and run jekyll serve -w again to make sure it all works.
Code syntax in your Jekyll posts
If like myself, your blog is more about code development and hacks - sometimes you will need to include lines of code in your posts and you need syntax formatting and colouring in order for the code to be pleasant to the eyes and easy to read. You can use a highlight helper integrated with Jekyll but you should install the required Ruby gems:
$ gem install rouge
To colour it properly you will have to add a nice CSS stylesheet. But don’t worry because Rouge is completely compatible with Pygments and you only have to download from there the CSS you want and include it in your project. The only caveat is that you have to replace the tag with the markdown or html generated from the exports
(usually ``` or
<pre><code>blocks) with the Jekyll helper for highlighting.
The post related content by default with Jekyll provide a simple way to get related content limiting it to the ten most recent posts. If you want to improve this relationship of content you should install also a couple of Ruby Gems more
$ gem install classifier-reborn
Finally, to take advantage of this, you should build the site using the –lsi option with the jekyll build command.
$ jekyll build --lsi
After all these steps you will have the content previously created from Wordpress in your new an passionate Jekyll site. From now on, you will be free to write and edit using your HTML skills the content you want in your site. Credit to jmtalarn
Generate new site
When done, you will need to regenerate your blog/site with new changes
$ bundle exec jekyll serve --incremental
Now that you have a reliable site, you will need to make changes on the _config.yml file to suit your own needs.
For example (Optional):
- Maintaining URL’s: What you want to do when moving blogs is keep your existing URL’s or setup redirects. I opted for keeping existing ones. WordPress usually follows the format:
http://domain.com/year/month/day/titleIn order to have this same format in Jekyll, add the following line to _config.yml
permalink: /:year/:month/:day/:title/ - Setting up Comments with Disqus.com.
- Setting up an RSS subscription.
- Setting up custom domain.
- Setting up stats and monetization.
- The next post will detail how I was able to integrate Google Analytics and Google Adsense(Including adding a JS to notify visitor if they have adBlock on)
Done!!!
When you are happy with how your site looks and feels, you’re ready to go live:
# Ensure that you're on master branch
$ git commit -am'Imported wordpress' && git push origin master
Wait a few minutes and you should see your new site on https://<username>.github.io.
If something goes wrong, you’ll get an email from GitHub. I recommend you always try generating locally using
$ jekyll serve
# or
# bundle exec jekyll serve
before pushing.
Maintaining the site
You can of course use any editor now to write content and if these support markdown, even better. Personally I use Sublime Text and stackedit.io[Great for realtime formats] and it works extremely well. I’ve got a few templates set up to create new posts, it offers spell checker, navigation and it also helps when working with styling and re-factoring elements.
Not really done!
I’ve still not completely finished the migration. Still have some tweaking of the design, and fixing up previous content, but I thought I’ll write this guide out seeing I have everything more or less fresh still. It might suffer some adjustments.